The last time I posted a “little lesson” we looked at controlling the focus so that your camera didn’t make incorrect decisions about what the subject is in your picture. So now all your photos are sharp where you need them to be sharp, you’re half way to having control. The only other challenge is exposure. “Aha”, I hear you say, a technical word, you said that it was easy to take control of your compact without learning techie stuff, well, I’ll keep my part of the bargain. I’ll tell you what exposure is, and you’ll realise you knew anyway.
Exposure: Basically, this is the brightness of your picture. If it’s over-exposed then it’ll look too bright and some of the detail will be lost to a wishy-washy brightness. If it’s underexposed it’ll look too dark, and again there will be areas that are too dark and it’ll be hard to see the detail. See how easy this is!
Exposure more or less equals the brightness, and when you have got it right the picture will show as much detail as it is possible to see. (Not too dark and not too light).
So what, many people will tell you that the best place for the compact camera is auto, where you only have to think about composing the picture; the camera is so good at getting this right itself, that I don’t need to think about it! Wrong. Every camera I own or use, two high end compacts and a decent midrange Digital SLR have the same predictable habit; they get it rightish most of the time, but they often get it wrong. Think about it, when you check the screen on your compact, can you honestly say that it hasn’t made the picture too bright or too dark?
There are some situations that cameras really struggle with. Snowscenes, or bright skies with foreground in shadow, portraits with bright areas like skies behind the subject. The camera tends to attempt to get most of the scene the right brightness, but if the scene has for example a face, with a bright background, the face may be too dark since it’s a small part of the overall scene; you see the camera may not know that the face is the most important face in the world to you, and slightly too dark (underexposed), all its microchip cares about is that most of the scene is about right..not good enough for an important picture.
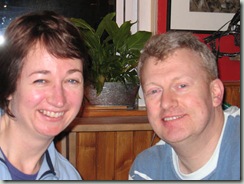
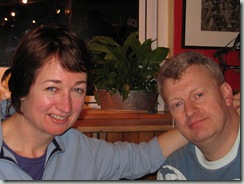
Above: The first snap is out of focus, but more importantly for us here, too bright (overexposed). A quick decrease on my exposure compensation control and my friend’s faces are more detailed and just the right brightness.
To be fair, cameras use “intelligent” scene recognition to try to guess when a person is backlit, and therefore to allow the face to be correctly exposed, and allowing the background which doesn’t matter quite as much to you, to be a little too bright. In my experience, the automation only works sometimes, but that might get better in the future.
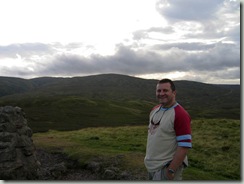
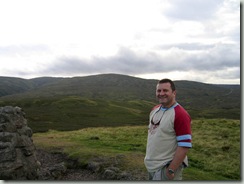
Above: Here the camera has exposed for the sky and my friend’s face is darker than I would like. Increasing the exposure in software improves the brightness and detail of his face.
So you’ve looked at the screen, and aunt Madge looks too dark (but in perfect focus, well done) while the vast Arizona skies and setting sun behind her are perfect. The camera got it wrong again. Most people will shrug and say, “it’s only a snap, I can make her out, it’ll do”. But you care! Remember my promise, you don’t need to be all techie to take control and have a picture that aunt Madge will put in a frame and treasure for ever. So what do you do?
Most decent cameras, have a little control called “Exposure Compensation”
![]() The symbol will usually look like this if it’s on a camera button. (Check your manual).
The symbol will usually look like this if it’s on a camera button. (Check your manual).

Sometimes (as above) it is a button on the camera, that you can press after taking a picture, make a quick adjustment and take the picture again.
Just as often in a compact camera (below), it is in a “quick to reach” menu, so that you call it up to make the adjustment after a picture that you think could be better.


Note: Canon use a different symbol in their menu. It doesn’t matter, just find what your compact uses.
These will pretty much always bring a little line onto your screen with a (+) at one end and a (-) at the other, sometimes with a zero at the centre. Once you call them up, you simply use your camera’s controller to move it up if you need to make the next picture brighter or down to make the next one darker. That’s it, it’s that easy; find your exposure compensation control, and now get into the habit of checking the picture after you have taken it to see if it’s too bright or too dark where you need it to be just right, adjust the control and take the picture again if you need to.
Note: I’m assuming you can see the screen, If its too bright/sunny you might need to cover it to check. (I’ll share a better way to check this in a later lesson, but that’s enough for now).
Summary: So now you can use centre selected manual focus before “recomposing” the picture while half pressing the shutter. You can also adjust the picture brightness and take the picture again if you’re not fully happy with it.
Note: Not all cameras have all functions, exposure compensation and user controlled focussing would be normal in all but the very cheapest compacts. As before, if you are still confused, check with your local camera shop, and maybe buy something from them!
Next lesson: I’ll show you another way to achieve the same thing with your compact if it has selectable metering modes.
