This may seem an odd subject to make a fuss about, but my experience has been that it causes more hassle and stress than any other aspect of learning photography. Ask yourself, “how many times have I left my DSLR at home because I didn’t want to carry it”?
It is often said that the best camera you own is the “one that you have with you”. In the ideal world you would take your DSLR with you everywhere, since it is probably optically and in terms of responsiveness your best camera; you don’t always carry it though do you?
Around town you would probably feel a bit of a prat, and opt instead for a compact in your pocket since you aren’t sure you’ll take any pictures anyway. This seems a reasonable strategy since none of us want to look like prats! (Actually I don’t need a DSLR in the middle of the queue at Asda (Wall Mart to US readers) to make me look a prat, I have that covered already). But what if you are going hillwalking or trekking? Should you take the compact instead?
If you take the compact you will be able to hang it on your rucksack’s waistbelt and it will be simple to whip out at a moments notice. This is an acceptable strategy but remember:
Compacts have:
- Poorer dynamic range and will blow out skies more readily. The new generation look like they may be tackling this by doing virtual HDR in camera. Eg Fuji F200
- The Depth Of Field will be enormous and so artistic selection of your partner’s beautiful chops against a blurred mountainscape will be impossible and you will look like a rank amateur. (Actually that would at least be accurate in my case, but why advertise the fact).
- The low light landscapes will be grainy and noisy since the small sensors in compact cameras can’t yet do low light to anything like the standard of even a cheap DSLR. The sensors are generally at least 10X larger, often 15X or 20X larger.
- You suddenly see an Ibex out of the mist. Your compact doesn’t have the telephoto reach, but you have a 200mm lens for your DSLR. If it is to hand, the quality and reach will always trump your compact.
So you know you really should carry and use that DSLR, but you are a walker and you have a rucksack with your flask and sandwiches, your waterproofs and other safety gear. There’s barely room for a DSLR but you conscientiously stuff it in there anyway. That’s OK isn’t it?
Actually , no. I tried that a few times, as did my friends and you know what? You hardly take any pictures. Its just a lot of hassle to take your pack off and unbuckle it, dig for the camera, undo its cover, remove the lens cap and take the picture. Then you reverse the process, and heft the pack onto your back again and start walking. At that moment you see some lovely light hitting the ridge your descending and it is perfect. Do you dismount your rucksack again and get your camera? No you say, “sod that, it’s too much hassle.”
1st law of walking or trekking photography: “The camera that’s hard to get at won’t be used when it should.”
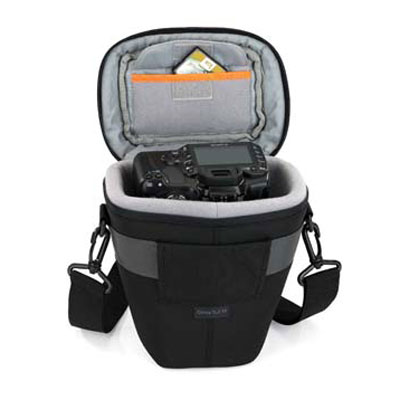
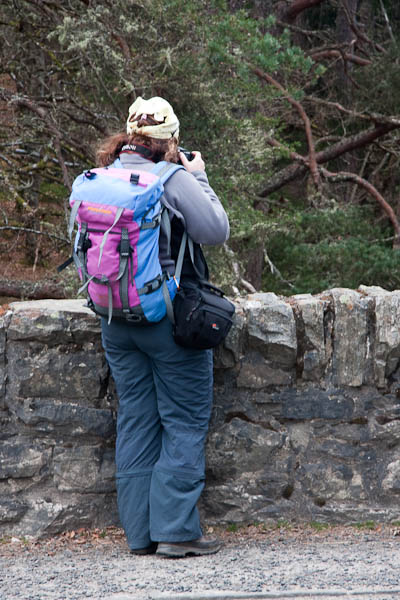
So your camera needs to be near to hand. Perhaps you could carry it in your hand? No. It will be tiring, it might get knocked against things, it might rain. A mountain gorilla might snatch it from you and run away. So you try what we all think is the logical next step. You get hold of a “holster style” DSLR bag with a loop to attach it to the waistbelt of your rucksack. For many people this will work fine, but personally I find it a bit limited. On the plus side the camera is at waist level, one buckle unclipped and the camera is in your hand, but if it is at the front, it might limit your thigh movement and hit off your legs while you walk uphill and drive you crazy. If you move it to the side of your waist you might find that it stops you from swinging your arms like a proper baubly-hatted trekker should. Many packs won’t even allow this because of the trend towards putting large pockets into the waistbelt at the side of your hips. This enlarges the belts at this point and means the “holster bag” can’t fit over these pockets and so has to sit at the front knocking irritatingly against your legs. For some people this is clearly OK, but most people find it irritating and will gravitate back to placing the camera in the pack: This of course will break the 1st law of walking or trekking photography:-)

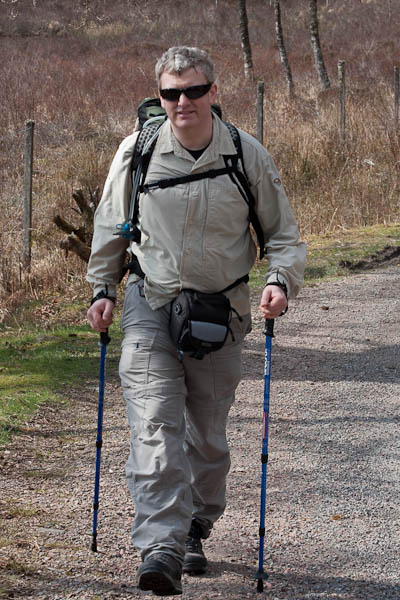
Only one of the two friends pictured her finds the holster pack comfortable. I won’t of course say which:-)


So you won’t be surprised to know that I have a suggestion based on a bit of trial and error and a few extended trips to try out different approaches. My preferred option is to carry a waistpack at my front. The nature of a small waistpack is that the camera sits on it’s side rather than vertically like a simple holster bag. This means that it is less likely to impede your legs when climbing hills. Now this is a great solution, but there are two problems which need to be overcome:
1. The waistbelt of the waistpack wants to sit where the waistbelt of your rucksack sits. They can’t comfortably sit in the same place.
2. If the waistpack is too large then it will sag down and hit your legs again. This limits how much gear you can fit in it.
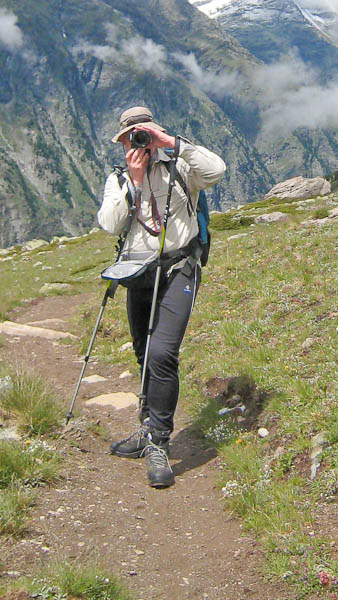
So the solution is The Lamont System. (Named by myself and my friends after my wife who came up with it and lashed up my first go at it). Because the waistbelts have to be on the same position on your waist, you need to attach the waistpack belt onto the waistbelt of your rucksack. You do this by attaching two corresponding plastic buckles to your rucksack waistbelt so that you can put your rucksack on as normal, then clip your camera waistpack on to the front, tighten it up and then enjoy one waistbelt, high enough to be out of the way of your legs, and the whole thing of course supported by your shoulder straps. This of course means that the waistbelt doesn’t need to be uncomfortably tight. (If you have tried a waistpack before on its own, you may have found it slipping down unless it was uncomfortably tight). I have found the Lamont System to be the most comfortable and practical way to carry my camera by far. I was on a guided trek around the Matterhorn last summer, and the guide expressed concern before we started that photographers often slowed the group by going through the pack removal that I described earlier. She was intrigued by the Lamont System. Suffice to say that I take 700 pictures of the party over 5 days trekking and never had to do more than unzip the pack and drop the lens cap into the pack, all while walking. Then stand still for long enough to nail the picture and put the camera back in the waistpack while walking! Our guide was happy and I took pictures the instant a great moment occurred.
Here’s my favourite set up in the Swiss Alps:

This shows it in use. Note I don’t even have to down sticks!

And a brutally enlarged close up from the first picture showing the extra plastic buckles sewn on to the rucksack belt. These buckles are readily available at all good outdoor shops.
.jpg)
Many packs will not have a fixing point for the buckles, so not every rucksack will be suitable. The waistbelts that have built in pockets again will thwart you. If the waistbelt is just a straight belt round to the rucksack back, then it’s easy to stitch on a buckle with a couple of loops of strong thread. Every rucksack will need to be judged individually for it’s suitability for the Lamont System. I’m happy to advise anyone who gets in touch.
I tried a larger pack for a Lamont System for our recent Great Glen way walk. This pack allowed me to carry a separate lens and more room for polarisers etc. I took my 40D and it’s 17-85IS lens with my 70-300IS lens and to be honest, although it was OK over 6 days walking, it wasn’t as perfectly comfortable as my main Lamont system with it’s smaller Lowepro pack. Previously I have taken my 40D and a general purpose Sigma 18-200 OS. In retrospect I will go back to the single lens. This is in keeping with the:
2nd law of walking or trekking photography: “The simplest DSLR system that gives the widest focal range is best.”
Note: The waistpack I favour is the Lowepro Orion Mini the one that is too large for a comfortable “Lamont System” is the Inverse 100 AW
My 17-85 and 70-300 are optically superior to my Sigma 18-200, but looking through my Alpine shots with this lens from last year, the quality difference was too small to matter. The kind of quality differences that matter in a lab test in “Digital Photography Review”, don’t matter in a walking trip. Catching the moment on your DSLR sensor is everything, minor lens sharpness deficiencies are nothing here.
Following my own 2nd Law I am going to return to my 18-200 for walking with a plan to try buying a smaller body such as a Canon 450D since it will deliver 99% of the quality of my 40D in a much lighter body. I might experiment with a 1.4X tele-extender if it’s small enough to go in the same waistpack with ease. If it won’t then I might upgrade to a Tamron 18-270 to stick with the 2nd Law.
Anyway, If you are a walker and a photo enthusiast I hope you will find my solution useful. If you have any other ideas then please let me know. Don’t go walking without your DSLR, that “moment” might never happen again!


I’ve just bought a Tamron 18-270mm and I’m really pleased with it. The image stabilisation almost totally does away with the tripod and is much better than the IS I had on by two canon lenses.